本文展示了如何用代码的方式添加用户属性。特别提示:在 Magento2 中,添加额外的用户属性字段可以在注册和用户中心页面收集更多有价值的用户信息。
添加用户属性步骤
-
第一步,新建安装文件 InstallData.php
-
第二步,定义 install() 方法
-
第三步,创建自定义属性
第一步,新建安装文件 InstallData.php
首先新建 InstallData.php
<?php
namespace Mageplaza\HelloWorld\Setup;

use Magento\Eav\Setup\EavSetup;
use Magento\Eav\Setup\EavSetupFactory;
use Magento\Framework\Setup\InstallDataInterface;
use Magento\Framework\Setup\ModuleContextInterface;
use Magento\Framework\Setup\ModuleDataSetupInterface;

class InstallData implements InstallDataInterface
{
	private $eavSetupFactory;

	public function __construct(EavSetupFactory $eavSetupFactory)
	{
		$this->eavSetupFactory = $eavSetupFactory;
	}

}
在这个类里边定义了用于和 Magento2 属性交互的 EAV 安装模块。
第二步,定义 install() 方法
定义 install() 方法并且创建 EAV 安装模块:
public function install(ModuleDataSetupInterface $setup, ModuleContextInterface $context)
	{
		$eavSetup = $this->eavSetupFactory->create(['setup' => $setup]);
	}
	Next, we will use eavSetup object to add attribute:
public function install(ModuleDataSetupInterface $setup, ModuleContextInterface $context)
	{
		$eavSetup = $this->eavSetupFactory->create(['setup' => $setup]);
		$eavSetup->addAttribute(
			\Magento\Customer\Model\Customer::ENTITY,
			'sample_attribute',
			[
				'type'         => 'varchar',
				'label'        => 'Sample Attribute',
				'input'        => 'text',
				'required'     => false,
				'visible'      => true,
				'user_defined' => true,
				'position'     => 999,
				'system'       => 0,
			]
		);
}
第三步,创建自定义属性
需要设置使用属性的表格。定义可以回调属性的 eavConfig 对象,并且他可以给属性赋值。创建客户属性的代码如下:
<?php

namespace Mageplaza\HelloWorld\Setup;

use Magento\Eav\Setup\EavSetup;
use Magento\Eav\Setup\EavSetupFactory;
use Magento\Framework\Setup\InstallDataInterface;
use Magento\Framework\Setup\ModuleContextInterface;
use Magento\Framework\Setup\ModuleDataSetupInterface;
use Magento\Eav\Model\Config;
use Magento\Customer\Model\Customer;

class InstallData implements InstallDataInterface
{
	private $eavSetupFactory;

	public function __construct(EavSetupFactory $eavSetupFactory, Config $eavConfig)
	{
		$this->eavSetupFactory = $eavSetupFactory;
		$this->eavConfig       = $eavConfig;
	}

	public function install(ModuleDataSetupInterface $setup, ModuleContextInterface $context)
	{
		$eavSetup = $this->eavSetupFactory->create(['setup' => $setup]);
		$eavSetup->addAttribute(
			\Magento\Customer\Model\Customer::ENTITY,
			'sample_attribute',
			[
				'type'         => 'varchar',
				'label'        => 'Sample Attribute',
				'input'        => 'text',
				'required'     => false,
				'visible'      => true,
				'user_defined' => true,
				'position'     => 999,
				'system'       => 0,
			]
		);
		$sampleAttribute = $this->eavConfig->getAttribute(Customer::ENTITY, 'sample_attribute');

		// more used_in_forms ['adminhtml_checkout','adminhtml_customer','adminhtml_customer_address','customer_account_edit','customer_address_edit','customer_register_address']
		$sampleAttribute->setData(
			'used_in_forms',
			['adminhtml_customer']

		);
		$sampleAttribute->save();
	}
}
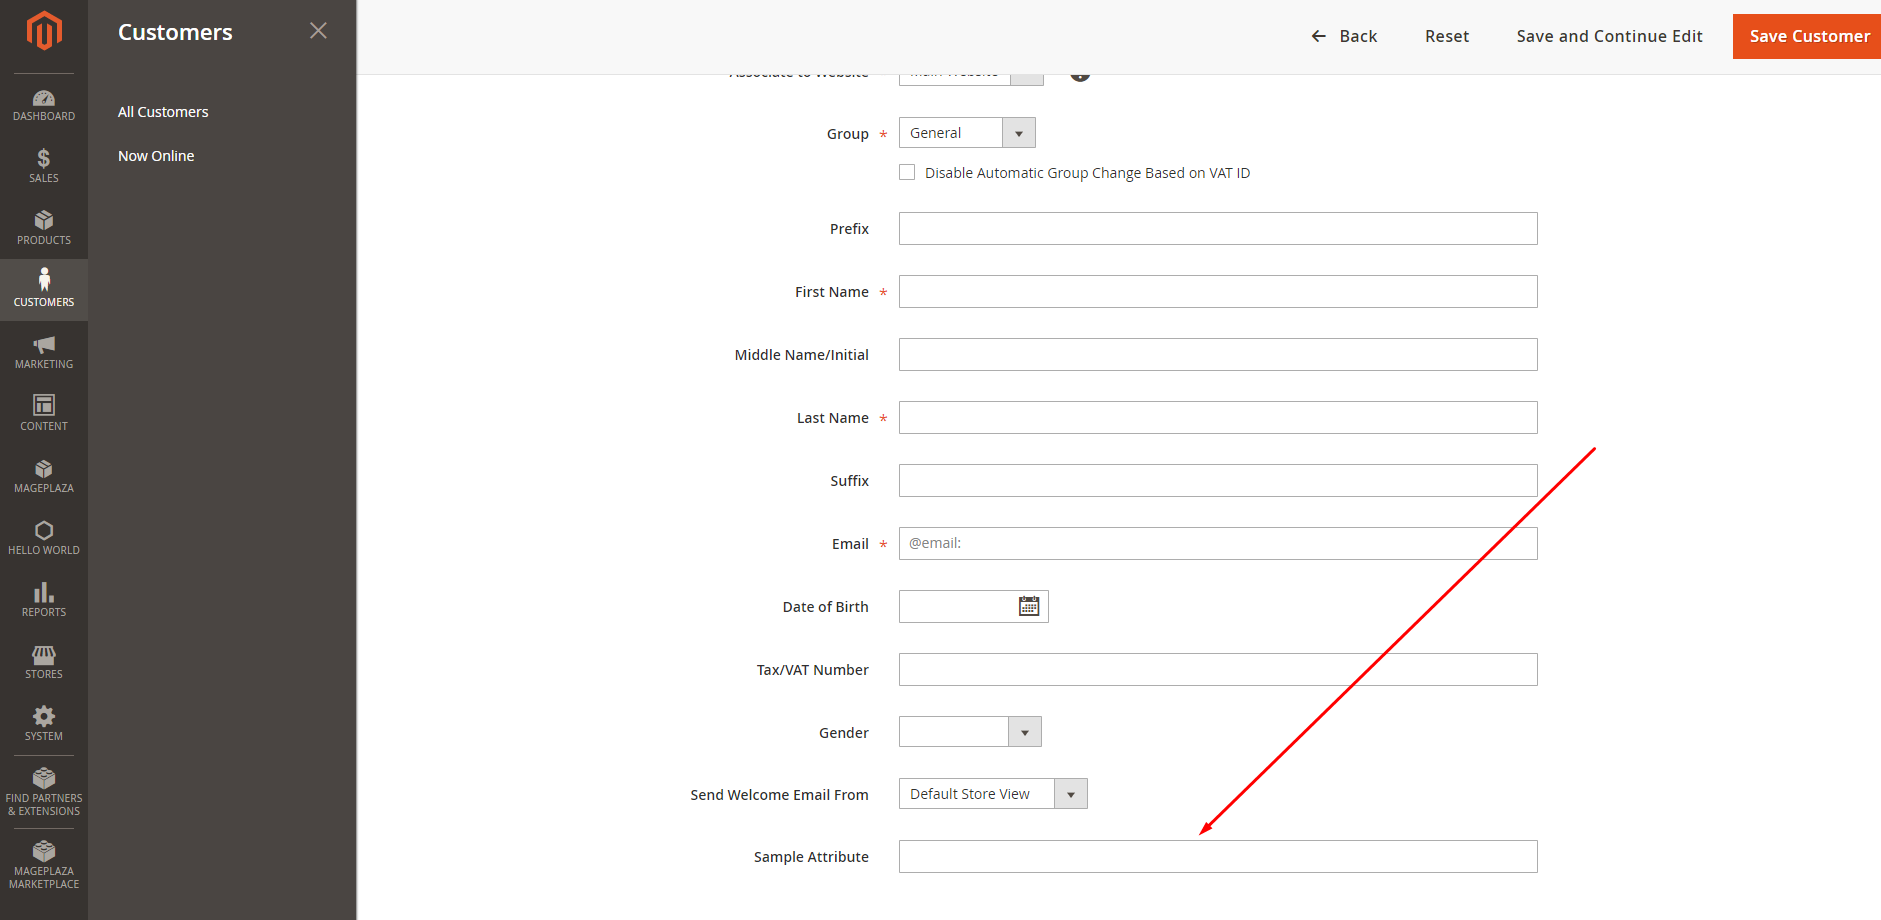
接下来,用以下命令安装模块 php magento setup:upgrade 和 php bin/magento setup:static-content:deploy ,然后查看结果,如下图所示: